
在上一篇文章《minio单机docker安装》我们介绍了minio的安装,在本篇文章,我们直接实战一下spring-boot操作minio文件系统的demo
一、创建一个maven项目,并且导入依赖
<dependency>
            <groupId>org.springframework.boot</groupId>
            <artifactId>spring-boot-starter-web</artifactId>
        </dependency>

        <dependency>
            <groupId>org.springframework.boot</groupId>
            <artifactId>spring-boot-devtools</artifactId>
            <scope>runtime</scope>
            <optional>true</optional>
        </dependency>
        <dependency>
            <groupId>org.springframework.boot</groupId>
            <artifactId>spring-boot-configuration-processor</artifactId>
            <optional>true</optional>
        </dependency>
        <dependency>
            <groupId>io.minio</groupId>
            <artifactId>minio</artifactId>
            <version>8.2.1</version>
        </dependency>
        <dependency>
            <groupId>org.projectlombok</groupId>
            <artifactId>lombok</artifactId>
            <optional>true</optional>
        </dependency>
        <dependency>
            <groupId>org.springframework.boot</groupId>
            <artifactId>spring-boot-starter-test</artifactId>
            <scope>test</scope>
        </dependency>
二、添加配置文件application.yml
spring:
  servlet:
    multipart:
      max-file-size: 10MB
      max-request-size: 10MB
#minio配置
  minio:
    access-key: OXspFQeLZwOVfFMc
    secret-key: PR098x1NotD6y2eOcBA8qAG3wdOrcqYw
    url: http://192.168.31.30:39000
    bucket-name: test1
三、编写minio的配置文件,MinioConfiguration.java
package com.minio.demo.config;

import org.springframework.boot.context.properties.ConfigurationProperties;
import org.springframework.context.annotation.Bean;
import org.springframework.context.annotation.Configuration;

import io.minio.MinioClient;
import lombok.Data;

@Configuration
@ConfigurationProperties(prefix = "spring.minio")
@Data
public class MinioConfiguration {

	private String accessKey;

	private String secretKey;

	private String url;

	private String bucketName;

	@Bean
	public MinioClient minioClient() {
		return MinioClient.builder().endpoint(url).credentials(accessKey, secretKey).build();
	}

}
四、编写controller
package com.minio.demo.controller;

import java.time.ZonedDateTime;
import java.util.Map;
import java.util.concurrent.TimeUnit;

import org.springframework.beans.factory.annotation.Autowired;
import org.springframework.web.bind.annotation.GetMapping;
import org.springframework.web.bind.annotation.PostMapping;
import org.springframework.web.bind.annotation.RequestParam;
import org.springframework.web.bind.annotation.RestController;
import org.springframework.web.multipart.MultipartFile;

import com.minio.demo.config.BaseResponse;
import com.minio.demo.utils.MinioUtils;

import io.minio.http.Method;

@RestController
public class UploadController {


    @Autowired
    private MinioUtils minioUtils;

    @PostMapping("/upload")
    public BaseResponse upload(@RequestParam("file") MultipartFile file, @RequestParam("fileName") String fileName) {
    	minioUtils.upload(file,fileName);
        String url = minioUtils.getUrl(fileName, 7, TimeUnit.DAYS);
        return BaseResponse.success(url);
    }

    @GetMapping("/policy")
    public BaseResponse policy(@RequestParam("fileName")String fileName) {
        Map policy = minioUtils.getPolicy(fileName, ZonedDateTime.now().plusMinutes(10));
        return BaseResponse.success(policy);
    }

    @GetMapping("/uploadUrl")
    public BaseResponse uploadUrl(@RequestParam("fileName") String fileName) {
        String url = minioUtils.getPolicyUrl(fileName, Method.PUT, 2, TimeUnit.MINUTES);
        return BaseResponse.success(url);
    }

    @GetMapping("/url")
    public BaseResponse getUrl(@RequestParam("fileName")String fileName) {
        String url = minioUtils.getUrl(fileName, 7, TimeUnit.DAYS);
        return BaseResponse.success(url);
    }

}
五、测试访问
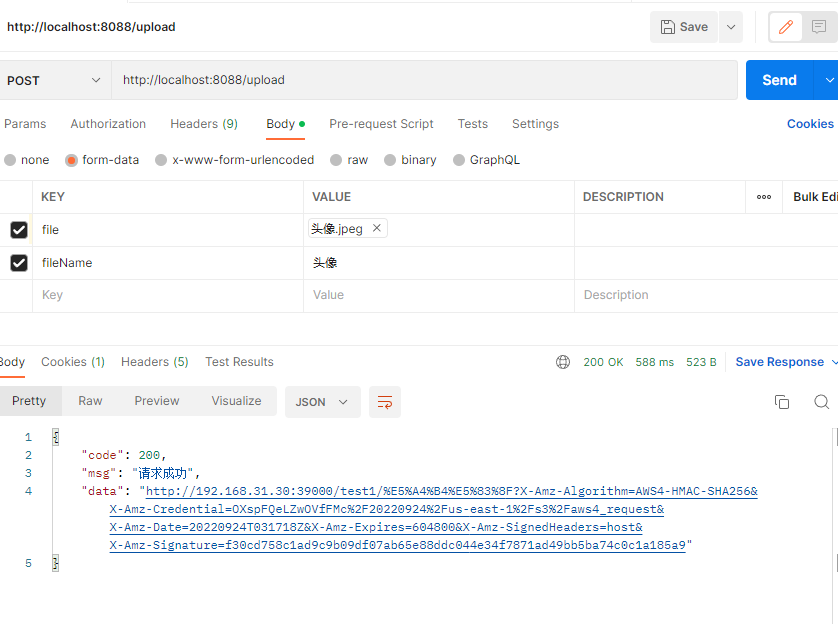
没有问题,正常返回了。到这里,整个demo就完成了。
备注:
1、在实际工作的编码里面,controller里面的逻辑需要进行调整下。
2、在实际工作的编码里面,test1这个bucket需要做一些策略处理,避免文件路径存储到数据库后路径过期导致访问不了。
3、使用minio也可以直接存储对应的文件名,然后每次访问的时候,通过文件名临时生成访问的url。
最后附上代码下载:点击下载


还没有评论,来说两句吧...