在现在的开放平台上,对接二次开发对接,大家对于安全的管控目前都主要采用的是appid和appsecret的方式进行对接。这里的appid和appsecret就相当于登录的用户名和密码。但是大家可以看到几乎在所有的平台上都是平台自动给分配的appid和appsecret。所以这篇文章我们介绍下这个appid和appsecret的自动生成案例。
生成appid和appsecret的话其实一般没有太多的要求,每个企业自己生成的规则也是不一样的。有句话说得好:
作为一个小厂的开发, 没有那么多需求, 只要生成的APP_ID有随机性,长度稳定, 长度不太长 就够用了
所以这里我们也没有太多的要求,我们采用的方式是随机生成一个使用8位的uuid来生成appid,然后使用appid+盐的方式生成appsecret。所以详细的案例如下:
生成appid的代码如下:
public static String getAppId() {
        StringBuffer shortBuffer = new StringBuffer();
        String uuid = UUID.randomUUID().toString().replace("-", "");
        for (int i = 0; i < 8; i++) {
            String str = uuid.substring(i * 4, i * 4 + 4);
            int x = Integer.parseInt(str, 16);
            shortBuffer.append(chars[x % 0x3E]);
        }
        return shortBuffer.toString();

    }
生成appsecret的代码如下:
public static String getAppSecret(String appId) {
        try {
            String[] array = new String[]{appId, slat};
            StringBuffer sb = new StringBuffer();
            // 字符串排序
            Arrays.sort(array);
            for (int i = 0; i < array.length; i++) {
                sb.append(array[i]);
            }
            String str = sb.toString();
            MessageDigest md = MessageDigest.getInstance("SHA-256");
            md.update(str.getBytes());
            byte[] digest = md.digest();

            StringBuffer hexstr = new StringBuffer();
            String shaHex = "";
            for (int i = 0; i < digest.length; i++) {
                shaHex = Integer.toHexString(digest[i] & 0xFF);
                if (shaHex.length() < 2) {
                    hexstr.append(0);
                }
                hexstr.append(shaHex);
            }
            return hexstr.toString();
        } catch (Exception e) {
        	log.error(e.getMessage(),e);
        }
		return null;
    }
代码看起来很简单,我们使用接口的方式进行调试,controller代码如下:
package com.appid.appsecret.controller;

import org.springframework.web.bind.annotation.RequestMapping;
import org.springframework.web.bind.annotation.RestController;

import com.appid.appsecret.model.AppInfoPoJo;
import com.appid.appsecret.model.BaseResponse;
import com.appid.appsecret.utils.AppUtils;

@RestController
@RequestMapping("/app")
public class AppController {

	@RequestMapping("/generatorAppInfo")
	public BaseResponse generatorNewAppInfo() {

		//首先调用utils生成appid
		String appId = AppUtils.getAppId();
		//再使用appid生成appsecret
		String appSecret = AppUtils.getAppSecret(appId);
		return BaseResponse.success(AppInfoPoJo.builder().appId(appId).appSecret(appSecret).build());
	}

	/**
	 * 模拟获取授权token
	 * @return
	 */
	@RequestMapping("/empower")
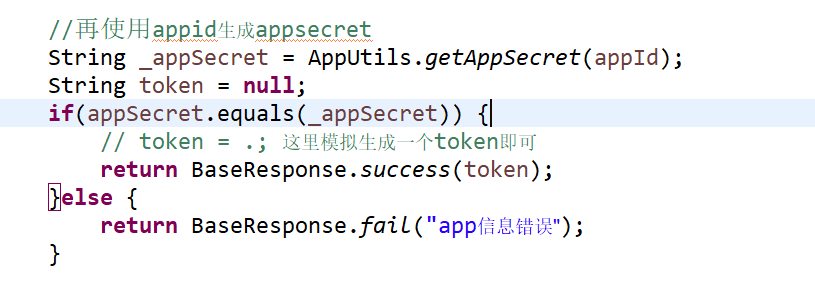
	public BaseResponse empower(String appId,String appSecret) {

		//再使用appid生成appsecret
		String _appSecret = AppUtils.getAppSecret(appId);
		String token = null;
		if(appSecret.equals(_appSecret)) {
			// token = .; 这里模拟生成一个token即可
			return BaseResponse.success(token);
		}else {
			return BaseResponse.fail("app信息错误");
		}

	}

}
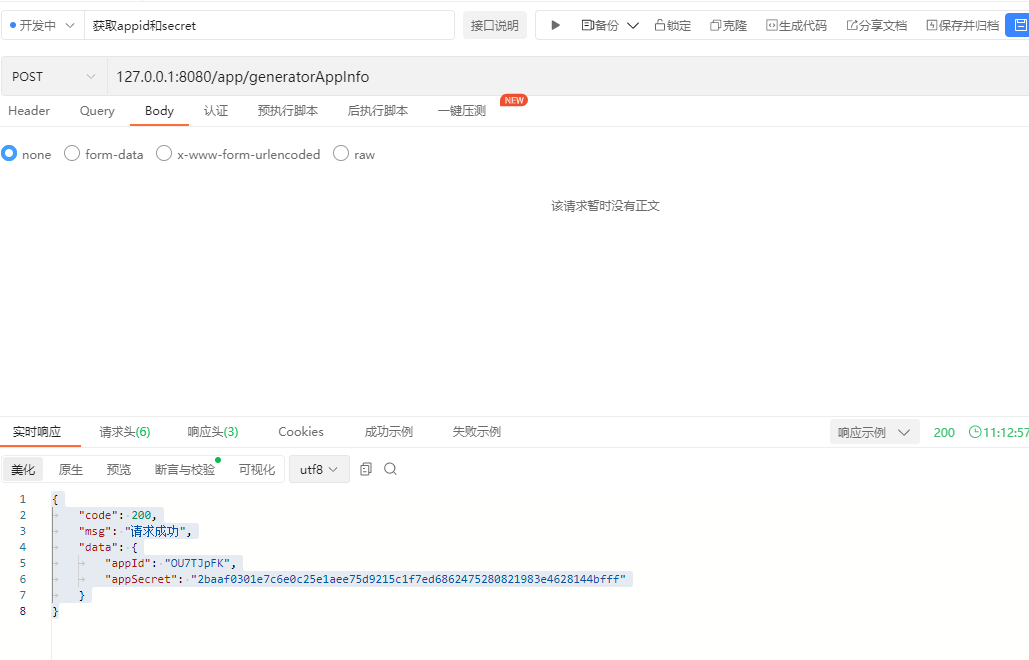
我们运行下,请求/app/generatorAppInfo接口,可以看到生成了appid和appsecret:
{
    "code": 200,
    "msg": "请求成功",
    "data": {
        "appId": "OU7TJpFK",
        "appSecret": "2baaf0301e7c6e0c25e1aee75d9215c1f7ed6862475280821983e4628144bfff"
    }
}这里的话我们是把盐写死的,真实环境中我们随机生成一个盐,把appid,appsecret,盐都存储到数据库中即可,如果用户需要登录授权,则从数据库取出对应的盐和appsecret,进行比较下即可。
当用户需要重置secret的时候,我们再重新生成一个盐,并且通过appid+新盐的方式生成一个最新的secret。
以上就是appid和appsecret生成的思路教程。按照管理,附上本案例的源码,登录后即可下载。


还没有评论,来说两句吧...