
前面《从0到1开始学习TiDB(六)使用tiup部署TiDB》部署的tidb集群在生产环境上持久的运行着。突然有一天需要容量不够了,比如我们要扩容下TiKV怎么办呢?这里就涉及到tidb的动态扩容了,本文来演示下实现tidb集群的动态扩容。
1、准备服务器
这里当然是需要准备新的服务器了,同样的,我们找一台新的服务器演示下。
2、配置ssh免密码登录
这里要在新的服务器上配置ssh免密码登录,还要在老的服务器上配置与新的服务器之间ssh免密码登录,详见《ssh免密码登录》。这里我们假设已经配置好了。

3、创建扩容配置文件
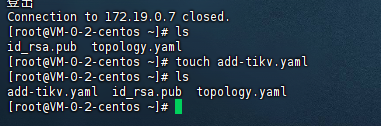
这里我们在原来安装tiup工具的服务器上创建一个add-tikv.yaml文件:
touch add-tikv.yaml
4、编辑add-tikv.yaml文件
把下面的内容插入进去:
tikv_servers:
  # # The ip address of the TiKV Server.
  - host: 172.19.0.7
    # # SSH port of the server.
    ssh_port: 22
    # # TiKV Server communication port.
    port: 20160
    # # TiKV Server status API port.
    status_port: 20180
    # # TiKV Server deployment file, startup script, configuration file storage directory.
    deploy_dir: "/home/pubserver/tidb_deploy/tikv-20160"
    # # TiKV Server data storage directory.
    data_dir: "/home/pubserver/tidb_data/tikv-20160"
    # # TiKV Server log file storage directory.
    log_dir: "/home/pubserver/tidb_deploy/tikv-20160/log"
    # # The following configs are used to overwrite the `server_configs.tikv` values.
    # config:
    #   log.level: warn
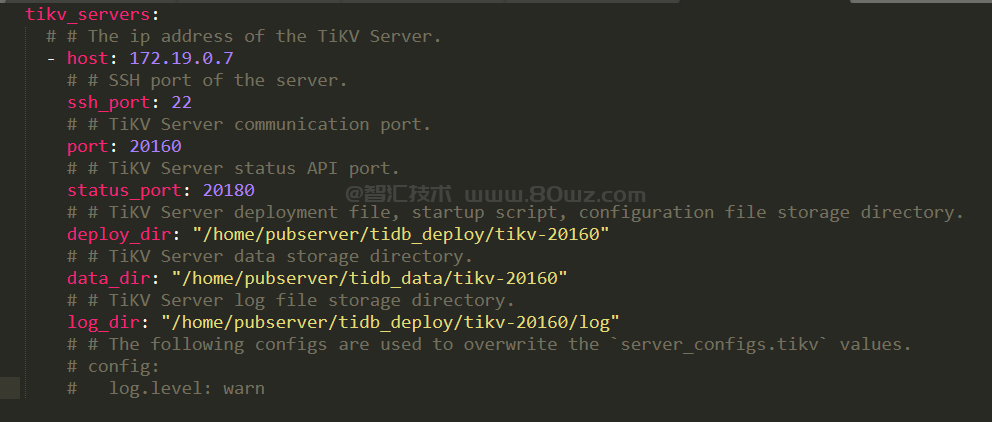
这里其实就是抄前面的topology.yaml文件的配置,我们需要扩容什么,就抄什么,记得把ip改掉即可。
5、通过扩容文件把新节点加入到集群中
这里使用tiup,把新扩容的文件添加到新的集群中去,执行如下命令:
tiup cluster scale-out tidb-test add-tikv.yaml -uroot -p
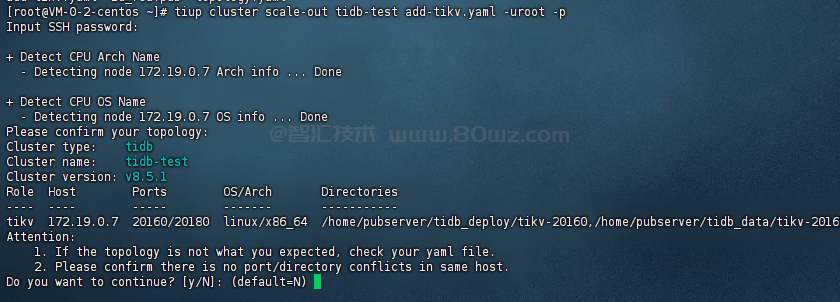
然后输入Y,执行安装即可,等待一会就可以看到安装完成了:
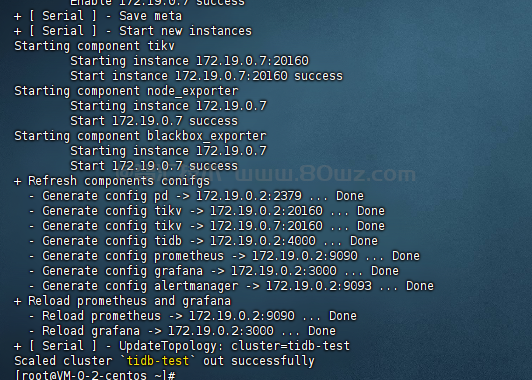
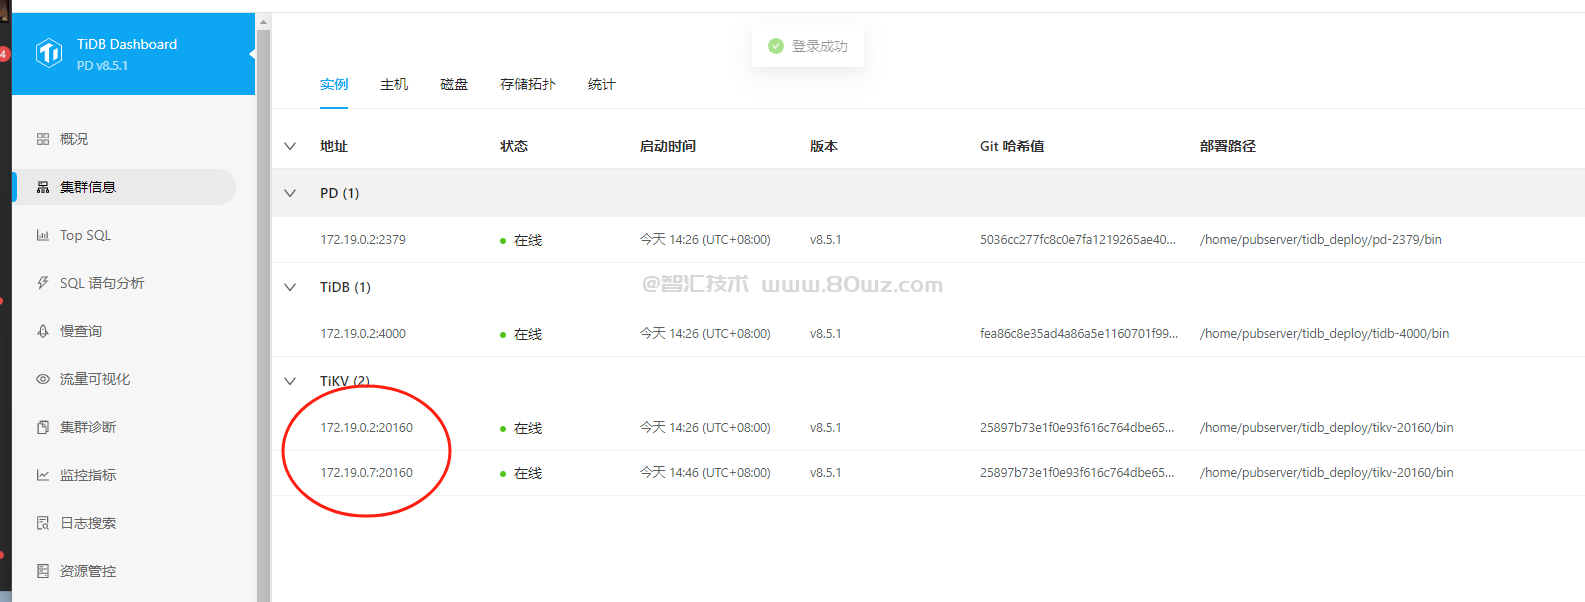
此时回到dashboard上,可看到刚才新添加的tikv节点上线了:
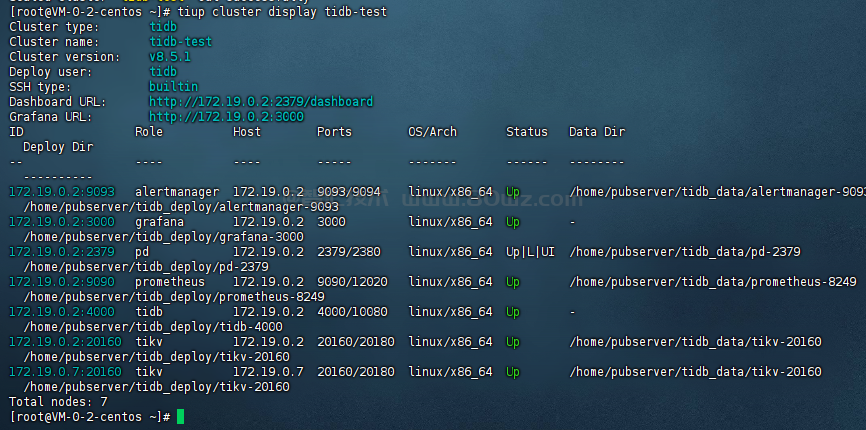
这里我们的扩容就完成了。当然还可以直接在命令行使用命令进行查看:
tiup cluster display tidb-test


还没有评论,来说两句吧...