
最近为了做DolphinScheduler的演示,因此需要一套大数据的环境,因此记录下这些大数据组件的安装。首先我们需要安装一个hadoop的环境,这里我们使用的hadoop版本是3.3.5,因此在192.168.31.218这台服务器上安装一个单机版本的hadoop,下面我们直接演示一下:
一、在官网下载hadoop
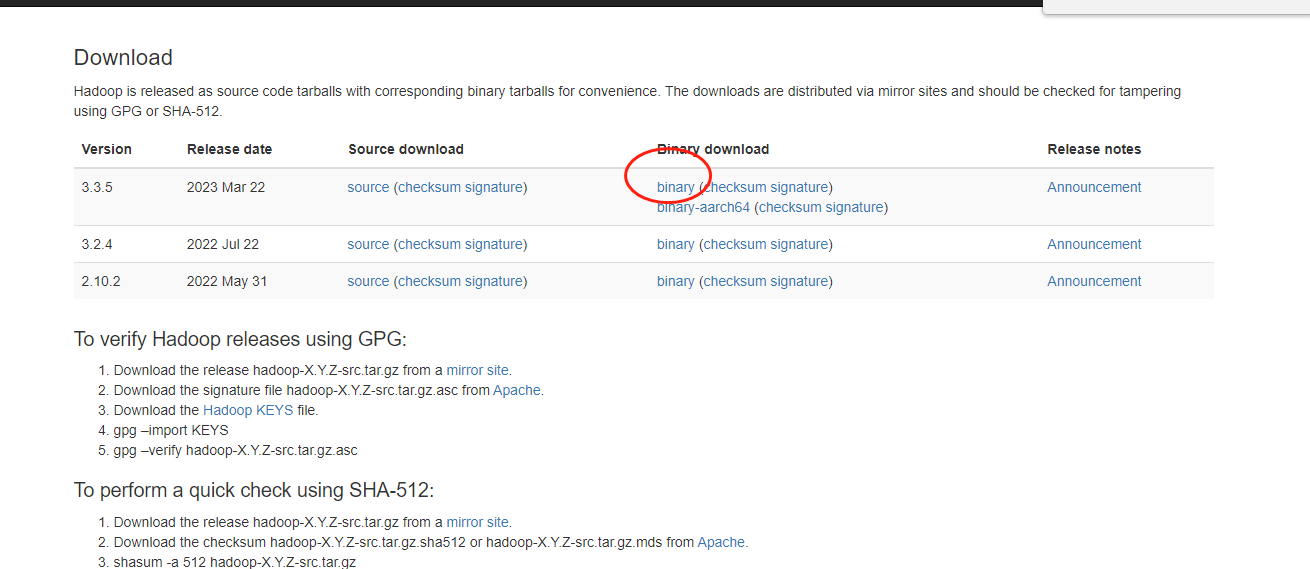
首先我们去hadoop的官网下载一个hadoop版本,hadoop官网下载地址是:hadoop官网下载。这里我们选择最新版本的3.3.5即可。
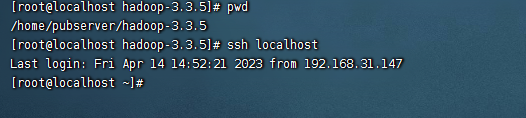
下载好之后,我们把他上传到服务器上,并且解压,解压后我们放的路径是:

二、配置服务器的ssh免密码登录
使用hadoop,这里即使是单机,也需要配置一个hadoop的免密登录,这里我们使用的是root用户,因此执行下面的命令即可配置ssh免密码登录:
ssh-keygen -t rsa -P '' -f ~/.ssh/id_rsa
cat ~/.ssh/id_rsa.pub >> ~/.ssh/authorized_keys
执行之后,我们就可以使用ssh localhost了
三、配置环境变量
接着我们编辑/etc/profile文件,把如下的信息添加进去
export JAVA_HOME=/usr/local/jdk1.8.0_271
export HADOOP_HOME=/home/pubserver/hadoop-3.3.5
export PATH=$PATH:$JAVA_HOME/bin:$HADOOP_HOME/bin
编辑完之后,我们执行下
source /etc/profile
四、进入到hadoop的配置文件目录修改配置文件
这里我们需要进入到hadoop的配置文件目录里面,修改配置文件,配置文件目录所在是:
${HADOOP_HOME}/etc/hadoop首先我们修改hadoop-env.sh文件,修改项主要如下:
#设置java_home
export JAVA_HOME=/usr/local/jdk1.8.0_271

#设置hadoop_home
export HADOOP_HOME=/home/pubserver/hadoop-3.3.5

#设置hadoop的conf_home
export HADOOP_CONF_DIR=${HADOOP_HOME}/etc/hadoop

#设置namenode的user为root
export HDFS_NAMENODE_USER=root

#设置datanode的user为root
export HDFS_DATANODE_USER=root

#设置secondarynamenode的user为root
export HDFS_SECONDARYNAMENODE_USER=root

#设置resourcemanager的user为root
export YARN_RESOURCEMANAGER_USER=root

#设置nodemanager的user为root
export YARN_NODEMANAGER_USER=root
接着我们修改core-site.xml文件,这个文件进去什么都没有配置,因此我们把下面的配置粘贴进去即可
<?xml version="1.0" encoding="UTF-8"?>
<?xml-stylesheet type="text/xsl" href="configuration.xsl"?>
<!--
  Licensed under the Apache License, Version 2.0 (the "License");
  you may not use this file except in compliance with the License.
  You may obtain a copy of the License at

    http://www.apache.org/licenses/LICENSE-2.0

  Unless required by applicable law or agreed to in writing, software
  distributed under the License is distributed on an "AS IS" BASIS,
  WITHOUT WARRANTIES OR CONDITIONS OF ANY KIND, either express or implied.
  See the License for the specific language governing permissions and
  limitations under the License. See accompanying LICENSE file.
-->
<!-- Put site-specific property overrides in this file. -->
<configuration>
    <!-- 设置默认使用的文件系统 Hadoop支持file、HDFS、GFS、ali|Amazon云等文件系统 -->
    <property>
        <name>fs.defaultFS</name>
        <value>hdfs://192.168.31.218:8020</value>
    </property>
    <!-- 设置Hadoop本地保存数据路径 -->
    <property>
        <name>hadoop.tmp.dir</name>
        <value>/home/pubserver/hadoop-3.3.5/tmpdata</value>
    </property>
    <!-- 设置HDFS web UI用户身份 -->
    <property>
        <name>hadoop.http.staticuser.user</name>
        <value>root</value>
    </property>
    <!-- 整合hive 用户代理设置 -->
    <property>
        <name>hadoop.proxyuser.root.hosts</name>
        <value>*</value>
    </property>
    <property>
        <name>hadoop.proxyuser.root.groups</name>
        <value>*</value>
    </property>
    <!-- 文件系统垃圾桶保存时间 -->
    <property>
        <name>fs.trash.interval</name>
        <value>1440</value>
    </property>
</configuration>
接着我们修改hdfs-site.xml文件,还是一样里面没有任何配置,我们把如下的配置复制进去
<?xml version="1.0" encoding="UTF-8"?>
<?xml-stylesheet type="text/xsl" href="configuration.xsl"?>
<!--
  Licensed under the Apache License, Version 2.0 (the "License");
  you may not use this file except in compliance with the License.
  You may obtain a copy of the License at

    http://www.apache.org/licenses/LICENSE-2.0

  Unless required by applicable law or agreed to in writing, software
  distributed under the License is distributed on an "AS IS" BASIS,
  WITHOUT WARRANTIES OR CONDITIONS OF ANY KIND, either express or implied.
  See the License for the specific language governing permissions and
  limitations under the License. See accompanying LICENSE file.
-->
<!-- Put site-specific property overrides in this file. -->
<configuration>
    <!-- 设置SecondNameNode进程运行机器位置信息 -->
    <property>
        <name>dfs.namenode.secondary.http-address</name>
        <value>192.168.31.218:9868</value>
    </property>
</configuration>
接着我们修改mapred-site.xml文件,把如下的配置复制进去即可
<?xml version="1.0"?>
<?xml-stylesheet type="text/xsl" href="configuration.xsl"?>
<!--
  Licensed under the Apache License, Version 2.0 (the "License");
  you may not use this file except in compliance with the License.
  You may obtain a copy of the License at

    http://www.apache.org/licenses/LICENSE-2.0

  Unless required by applicable law or agreed to in writing, software
  distributed under the License is distributed on an "AS IS" BASIS,
  WITHOUT WARRANTIES OR CONDITIONS OF ANY KIND, either express or implied.
  See the License for the specific language governing permissions and
  limitations under the License. See accompanying LICENSE file.
-->
<!-- Put site-specific property overrides in this file. -->
<configuration>
    <!-- 设置MR程序默认运行模式: yarn集群模式 local本地模式 -->
    <property>
        <name>mapreduce.framework.name</name>
        <value>yarn</value>
    </property>
    <!-- MR程序历史服务地址 -->
    <property>
        <name>mapreduce.jobhistory.address</name>
        <value>192.168.31.218:10020</value>
    </property>
    <!-- MR程序历史服务器web端地址 -->
    <property>
        <name>mapreduce.jobhistory.webapp.address</name>
        <value>192.168.31.218:19888</value>
    </property>
    <property>
        <name>yarn.app.mapreduce.am.env</name>
        <value>HADOOP_MAPRED_HOME=${HADOOP_HOME}</value>
    </property>
    <property>
        <name>mapreduce.map.env</name>
        <value>HADOOP_MAPRED_HOME=${HADOOP_HOME}</value>
    </property>
    <property>
        <name>mapreduce.reduce.env</name>
        <value>HADOOP_MAPRED_HOME=${HADOOP_HOME}</value>
    </property>
</configuration>
接着我们再修改yarn-site.xml文件,把如下的配置复制进去:
<?xml version="1.0"?>
<!--
  Licensed under the Apache License, Version 2.0 (the "License");
  you may not use this file except in compliance with the License.
  You may obtain a copy of the License at

    http://www.apache.org/licenses/LICENSE-2.0

  Unless required by applicable law or agreed to in writing, software
  distributed under the License is distributed on an "AS IS" BASIS,
  WITHOUT WARRANTIES OR CONDITIONS OF ANY KIND, either express or implied.
  See the License for the specific language governing permissions and
  limitations under the License. See accompanying LICENSE file.
-->
<configuration>
    <!-- 设置YARN集群主角色运行机器位置 -->
    <property>
        <name>yarn.resourcemanager.hostname</name>
        <value>192.168.31.218</value>
    </property>
    <property>
        <name>yarn.nodemanager.aux-services</name>
        <value>mapreduce_shuffle</value>
    </property>
    <!-- 是否将对容器实施物理内存限制 -->
    <property>
        <name>yarn.nodemanager.pmem-check-enabled</name>
        <value>false</value>
    </property>
    <!-- 是否将对容器实施虚拟内存限制。 -->
    <property>
        <name>yarn.nodemanager.vmem-check-enabled</name>
        <value>false</value>
    </property>
    <!-- 开启日志聚集 -->
    <property>
        <name>yarn.log-aggregation-enable</name>
        <value>true</value>
    </property>
    <!-- 设置yarn历史服务器地址 -->
    <property>
        <name>yarn.log.server.url</name>
        <value>http://192.168.31.218:19888/jobhistory/logs</value>
    </property>
    <!-- 历史日志保存的时间 7天 -->
    <property>
        <name>yarn.log-aggregation.retain-seconds</name>
        <value>604800</value>
    </property>
</configuration>
最后我们再修改workers文件,把本机的ip放进去
192.168.31.218
以上我们的hadoop基础环境配置就完成了。
五、格式化namenode
在hadoop第一次启动之前,我们需要首先把namenode进行格式化一下,执行下面的命令:
cd ${hadoop_home}
cd bin/
./hadoop namenode -format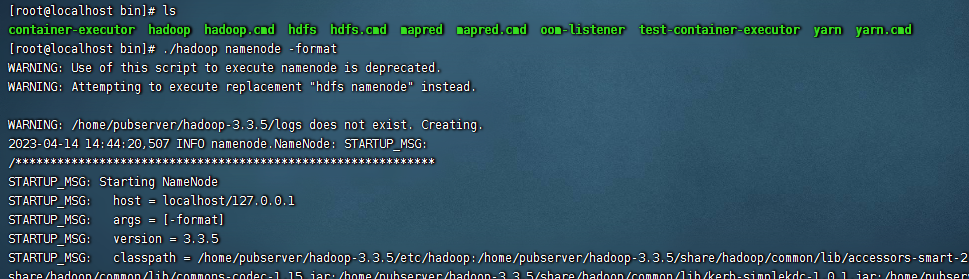
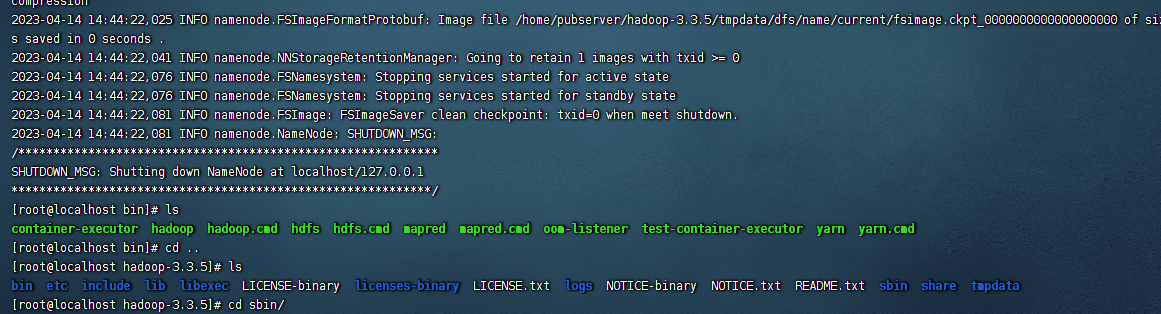
当出现如下的信息,就爱表namenode格式化好了
六、启动hadoop
这里相当于所有的前置工作都已经完成了,所以这里我们直接启动hadoop即可:
cd ${HADOOP_HOME}

cd sbin/

./start-all.sh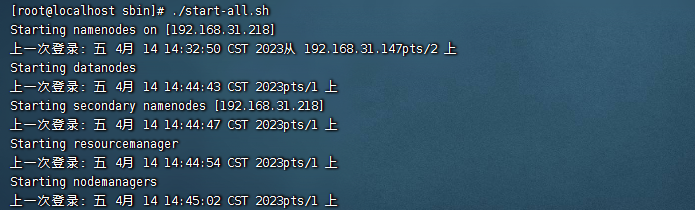
启动完成之后,我们执行jps命令,可以看到有5个进程,分别是:
namenode
datanode
resourcemanager
datamanager
secondarynamenode
如下图:
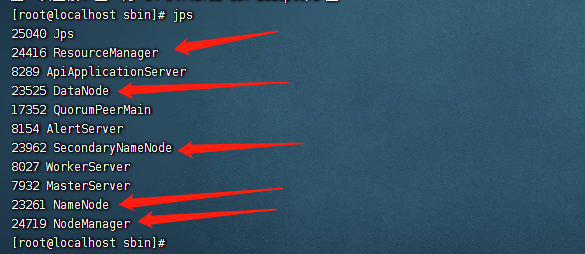
这里说明hadoop单机版本就搭建好了。
七、测试hdfs
首先我们测试下hdfs,这里的话,我们直接访问webui即可,访问地址是:
http://192.138.31.218:9870
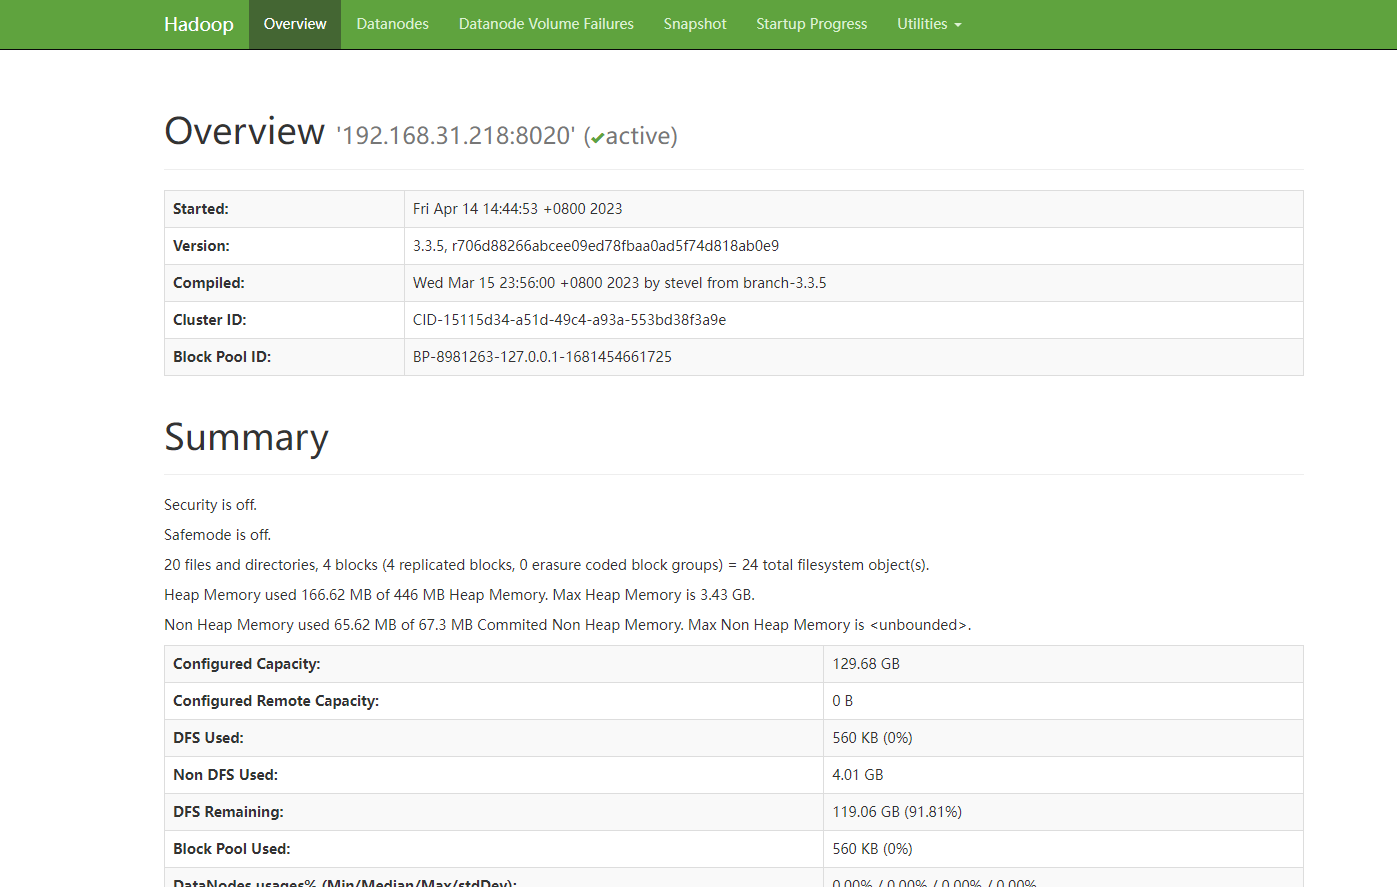
可以看到hdfs是完全正常的。
八、测试mapreduce
接着我们测试下这个集群是否可以运行mapreduce,这里我们暂时不需要直接写mapreduce-job,直接使用自带的mapreduce-job即可。使用如下的命令:
cd ${hadoop_home}

cd share/hadoop/mapreduce/

hadoop jar hadoop-mapreduce-examples-3.3.5.jar pi 2 4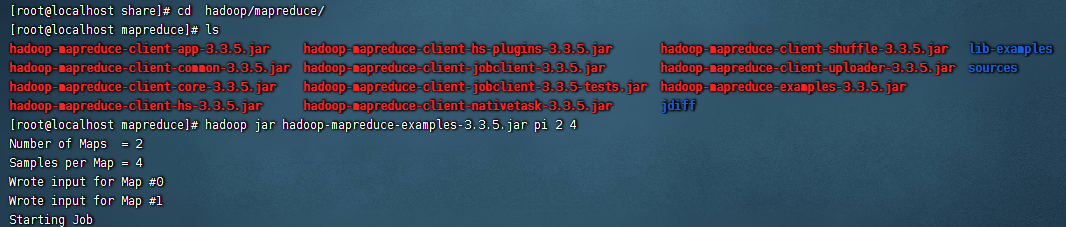
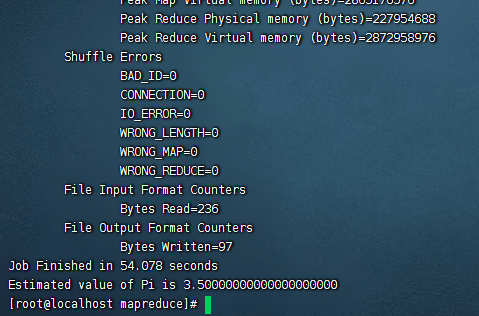
就可以看到自带的mapreduce的job已经在执行了,等到日志打印完毕,就可以mapreduce运行成功了。
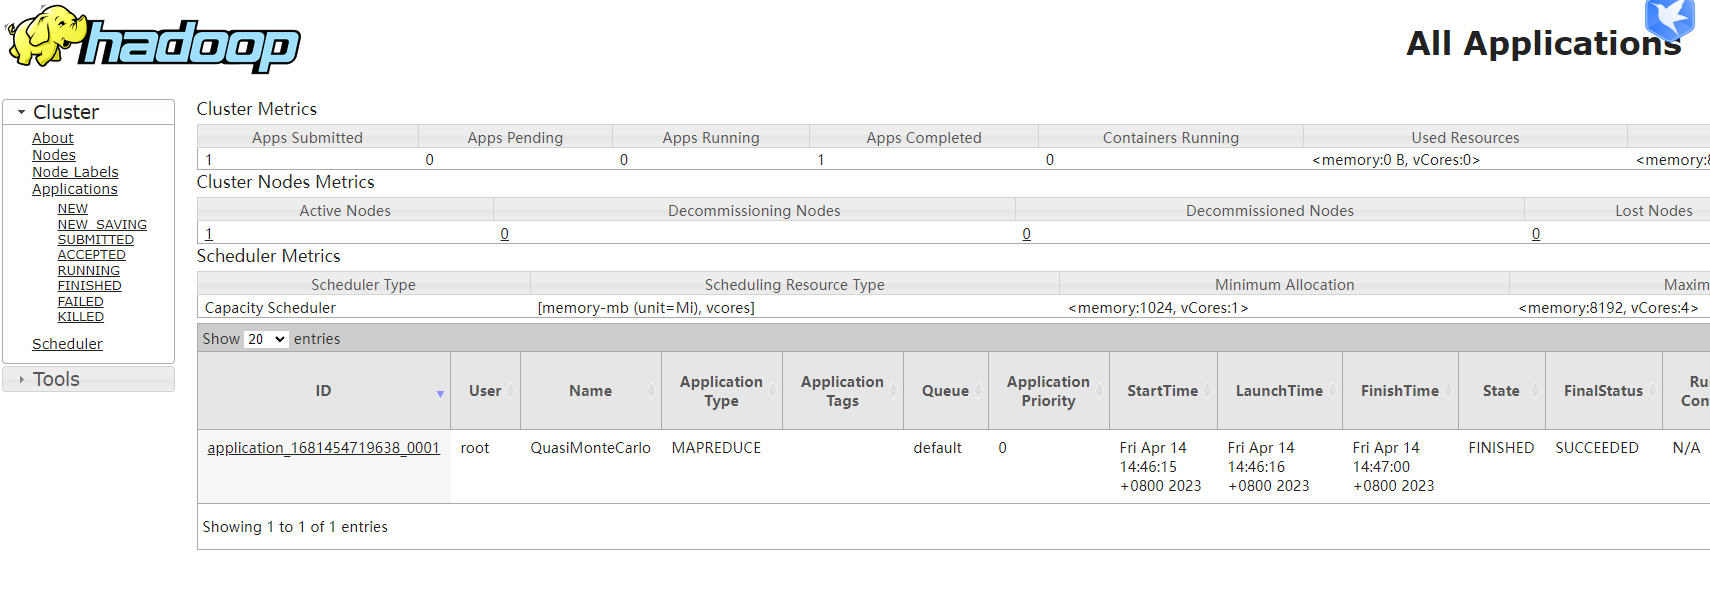
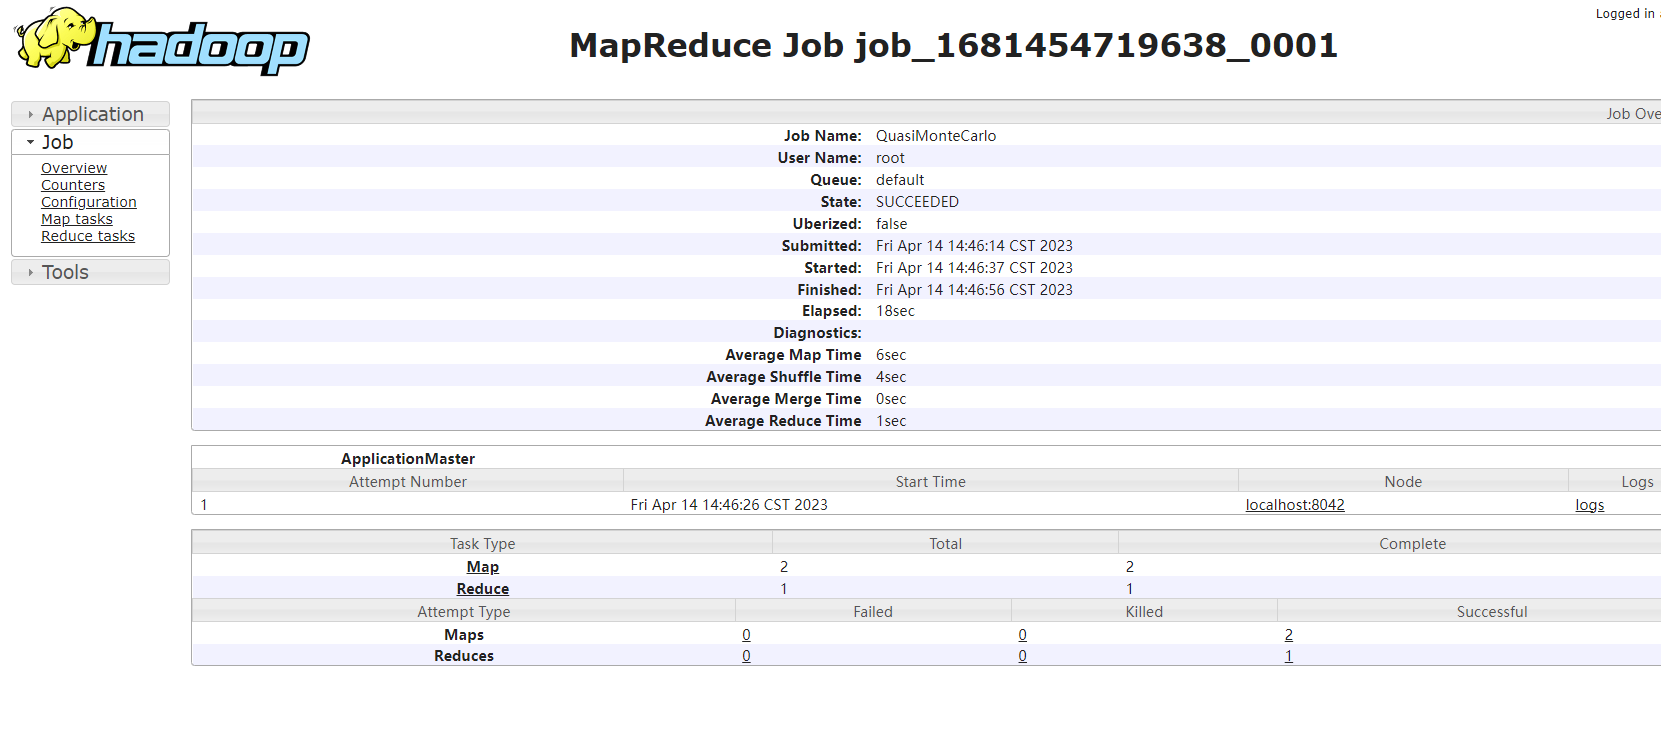
然后我们去yarn上看看mapreduce执行效果,访问地址是:
http://192.168.31.218:8088
至此,我们的hadoop3.3.5单机版安装就完成了。
备注:
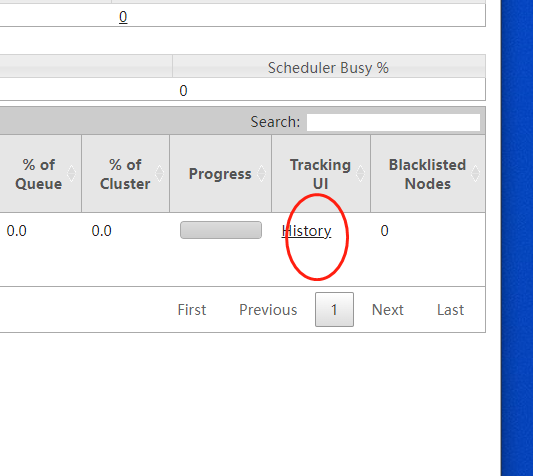
1、在mr执行的时候,我们经常会涉及到看历史运行的job日志,例如点击这里:
结果会发现访问是被拒绝,如下图:
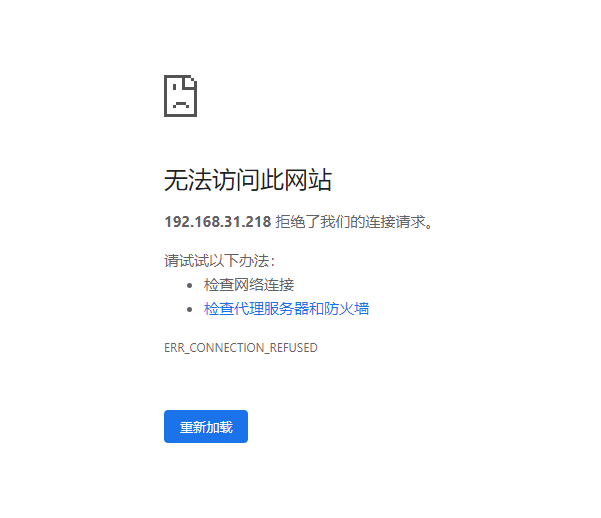
这是怎么回事呢,其实就是使用start-all.sh脚本启动的时候,默认是不会启动jobhistoryserver的,因此我们这里需要手动启动下,执行下面的命令:
cd ${hadoop_home}

cd bin/

./mr-jobhistory-daemon.sh start historyserver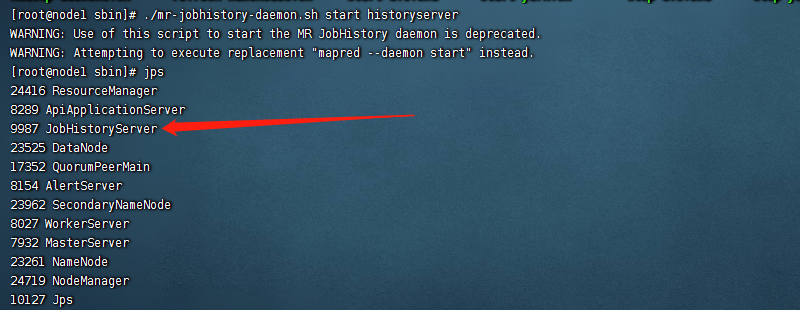
这里启动完成之后,我们再访问19888端口就没问题了。


还没有评论,来说两句吧...