
上文《Netty入门系列(一)简单编写netty服务端》我们已经实现了服务端的代码。这里我们再编写一个客户端的代码。
整个客户端的模式和服务端的模式是差不多的,主要步骤如下:
1、创建事件处理线程组
2、配置Bootstrap线程组启动netty客户端
3、添加客户端的处理handler
下面我们来演示下具体代码:
1)创建netty客户端
package com.netty.client;

import io.netty.bootstrap.Bootstrap;
import io.netty.channel.ChannelFuture;
import io.netty.channel.ChannelInitializer;
import io.netty.channel.nio.NioEventLoopGroup;
import io.netty.channel.socket.SocketChannel;
import io.netty.channel.socket.nio.NioSocketChannel;
import lombok.extern.slf4j.Slf4j;

/**
 * 客户端
 */
@Slf4j
public class NettyClient {
    // 服务器IP
    private String host;
    // 服务器端口
    private int port;

    public NettyClient(String host, int port) {
        this.host = host;
        this.port = port;
    }

    /**
     * 启动 Netty 客户端
     */
    public void run() throws InterruptedException {
        // 创建事件循环组
        NioEventLoopGroup group = new NioEventLoopGroup();
        try {
            // 创建 Bootstrap 对象
            Bootstrap bootstrap = new Bootstrap();
            // 配置Bootstrap线程组
            bootstrap.group(group)
                    // 设置客户端通信的通道类型为NIO类型
                    .channel(NioSocketChannel.class)
                    .handler(new ChannelInitializer<SocketChannel>() {
                        @Override
                        public void initChannel(SocketChannel ch) throws Exception {
                            // 添加消息处理器
                            ch.pipeline().addLast(new NettyClientHandler());
                        }
                    });
            // 连接服务器,等待连接成功
            ChannelFuture channelFuture = bootstrap.connect(host, port).sync();
            log.info("客户端启动完成");
            channelFuture.channel().closeFuture().sync();
        } finally {
            //释放资源
            group.shutdownGracefully();
        }
    }

}
2)创建netty客户端的处理消息handler
package com.netty.client;

import io.netty.buffer.ByteBuf;
import io.netty.buffer.Unpooled;
import io.netty.channel.ChannelHandlerContext;
import io.netty.channel.ChannelInboundHandlerAdapter;
import io.netty.util.CharsetUtil;
import lombok.extern.slf4j.Slf4j;

/**
 * 客户端用于处理与服务器交互的handler
 */
@Slf4j
public class NettyClientHandler extends ChannelInboundHandlerAdapter {

        /**
         * 连接上就触发这个方法
         */
        @Override
        public void channelActive(ChannelHandlerContext ctx) throws Exception {
            String message="你好,我是客户端";
            ByteBuf hello = Unpooled.copiedBuffer(message, CharsetUtil.UTF_8);
            // 发送消息
            ctx.writeAndFlush(hello);
        }

        /**
         * 与服务端进行数据交互
         */
        @Override
        public void channelRead(ChannelHandlerContext ctx, Object msg) throws Exception {
            ByteBuf buf = (ByteBuf) msg;
            log.info("服务端发来的消息:"+buf.toString(CharsetUtil.UTF_8));
        }

        /**
         * 发生异常
         */
        @Override
        public void exceptionCaught(ChannelHandlerContext ctx, Throwable cause) throws Exception {
            log.error(cause.getMessage(),cause);
            //出现异常关闭连接
            ctx.close();
        }
    }
3)创建启动client类
package com.netty.client;

import lombok.extern.slf4j.Slf4j;

/**
 * NettyClientApplication netty客户端的启动类
 *
 */
@Slf4j
public class NettyClientApplication
{
    public static void main( String[] args ) throws Exception {
        // 创建客户端对象,并连接到服务器
        NettyClient client = new NettyClient("192.168.31.115", 8888);
        // 启动客户端
        client.run();
    }
}
最后我们把项目启动起来:
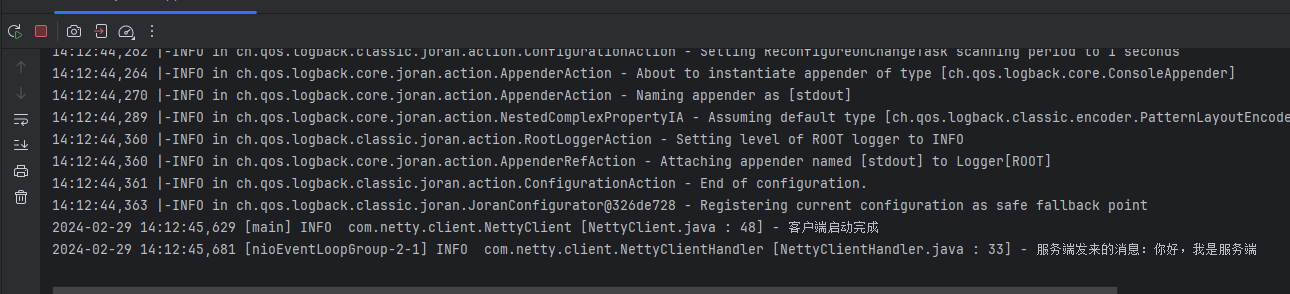
可以看到客户端连接上了服务端,并且收到了服务端的信息。然后我们看看服务端的日志:
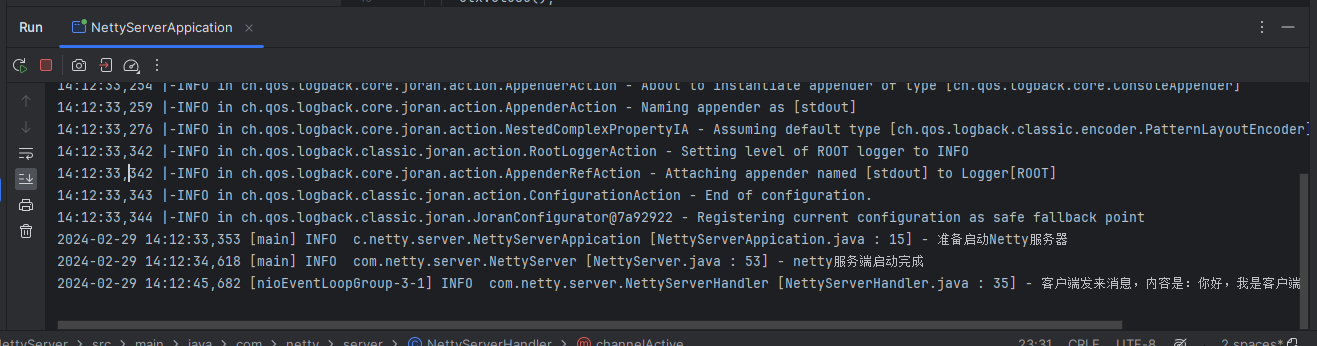
服务端也正常的收到了客户端的消息。说明我们成功的实现了客户端与服务端的打通。
最后按照惯例,附上本案例的源码,登陆后即可下载。


还没有评论,来说两句吧...