
上一篇文章《实战Spring Cloud Oauth2系列(一)Oauth2的介绍》我们粗略的介绍了一下Oauth2.0相关的一些核心内容,从本文开始,我们开始进入到oauth2.0相关的实战篇。
首先我们介绍下这个实战系列的模板,整体我们采用微服务的方式,因此这里我们主要是基于spring cloud alibaba这一套,因此整体的模板如下:
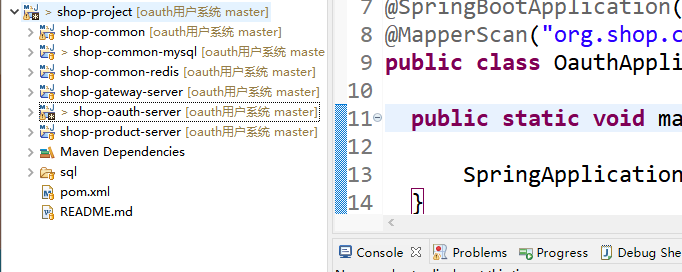
整个微服务体系里面,我们分为以下几个model:
1、common模块
2、mysql模块
3、redis模块
4、gateway模块
5、oauth模块
6、product模块
这里第一篇我们主要是实现一个oauth认证服务,因此这里我们主要做的是oauth模块的内容,这里是一个springboot的项目。下面直接开始:
一、创建oauth所需要的库表
使用oauth的话,我们所有的客户端信息及用户的信息都保存在数据库的,因此这里我们把client信息及user的信息都需要保存在数据库中,那么需要创建对应的库表结构,同时这里我们也引入一份测试数据:
/*
 Navicat Premium Data Transfer

 Source Server         : 30数据库
 Source Server Type    : MySQL
 Source Server Version : 50739
 Source Host           : 127.0.0.1:3306
 Source Schema         : auth

 Target Server Type    : MySQL
 Target Server Version : 50739
 File Encoding         : 65001

 Date: 05/05/2023 10:41:50
*/

SET NAMES utf8mb4;
SET FOREIGN_KEY_CHECKS = 0;

-- ----------------------------
-- Table structure for oauth_clients
-- ----------------------------
DROP TABLE IF EXISTS `oauth_clients`;
CREATE TABLE `oauth_clients`  (
  `client_id` varchar(255) CHARACTER SET utf8mb4 COLLATE utf8mb4_general_ci NOT NULL,
  `resource_ids` varchar(255) CHARACTER SET utf8mb4 COLLATE utf8mb4_general_ci NULL DEFAULT NULL,
  `client_secret` varchar(255) CHARACTER SET utf8mb4 COLLATE utf8mb4_general_ci NULL DEFAULT NULL,
  `scope` varchar(255) CHARACTER SET utf8mb4 COLLATE utf8mb4_general_ci NULL DEFAULT NULL,
  `authorized_grant_types` varchar(255) CHARACTER SET utf8mb4 COLLATE utf8mb4_general_ci NULL DEFAULT NULL,
  `web_server_redirect_uri` varchar(255) CHARACTER SET utf8mb4 COLLATE utf8mb4_general_ci NULL DEFAULT NULL,
  `authorities` varchar(255) CHARACTER SET utf8mb4 COLLATE utf8mb4_general_ci NULL DEFAULT NULL,
  `access_token_validity` int(11) NULL DEFAULT NULL,
  `refresh_token_validity` int(11) NULL DEFAULT NULL,
  `additional_information` text CHARACTER SET utf8mb4 COLLATE utf8mb4_general_ci NULL,
  `autoapprove` varchar(255) CHARACTER SET utf8mb4 COLLATE utf8mb4_general_ci NULL DEFAULT NULL,
  PRIMARY KEY (`client_id`) USING BTREE
) ENGINE = InnoDB CHARACTER SET = utf8mb4 COLLATE = utf8mb4_general_ci ROW_FORMAT = Dynamic;

-- ----------------------------
-- Records of oauth_clients
-- ----------------------------
INSERT INTO `oauth_clients` VALUES ('book', 'book-service', '$2a$10$3BXljBeizUwxO56Mus7RQuBTFc4A2rg2uPYVYc7zpy48IdQ2mOF9C', 'all', 'client_credentials,password,authorization_code,implicit,refresh_token', 'http://www.baidu.com', 'ROLE_ADMIN', 7200, 7200, NULL, 'false');

-- ----------------------------
-- Table structure for oauth_users
-- ----------------------------
DROP TABLE IF EXISTS `oauth_users`;
CREATE TABLE `oauth_users`  (
  `id` int(11) NOT NULL AUTO_INCREMENT,
  `username` varchar(100) CHARACTER SET utf8mb4 COLLATE utf8mb4_general_ci NULL DEFAULT NULL,
  `password` varchar(100) CHARACTER SET utf8mb4 COLLATE utf8mb4_general_ci NULL DEFAULT NULL,
  `age` int(11) NULL DEFAULT NULL,
  `mark` varchar(255) CHARACTER SET utf8mb4 COLLATE utf8mb4_general_ci NULL DEFAULT NULL,
  `status` tinyint(1) NULL DEFAULT NULL COMMENT '状态:1、可用,2、被禁用,3、被锁定,4、账号已过期',
  PRIMARY KEY (`id`) USING BTREE
) ENGINE = InnoDB AUTO_INCREMENT = 2 CHARACTER SET = utf8mb4 COLLATE = utf8mb4_general_ci ROW_FORMAT = Dynamic;

-- ----------------------------
-- Records of oauth_users
-- ----------------------------
INSERT INTO `oauth_users` VALUES (1, 'wang', '$2a$10$AaDq.ecXIwB1BkKO.hg7IexyaDNVCepikAu8VMgAclGEb1qQLuHve', 30, '30', 1);

SET FOREIGN_KEY_CHECKS = 1;
二、引入maven的依赖
这里由于我们只是加工oauth模块,因此需要在shop-oauth-server模块中引入下面的依赖:
    <dependency>
			<groupId>org.springframework.boot</groupId>
			<artifactId>spring-boot-starter-web</artifactId>
		</dependency>
		<dependency>
			<groupId>org.springframework.boot</groupId>
			<artifactId>spring-boot-starter-security</artifactId>
		</dependency>
		<dependency>
			<groupId>org.springframework.cloud</groupId>
			<artifactId>spring-cloud-starter-oauth2</artifactId>
		</dependency>
		<dependency>
			<artifactId>shop-common</artifactId>
			<groupId>com.shop</groupId>
			<version>1.0</version>
		</dependency>
		<dependency>
			<artifactId>shop-common-redis</artifactId>
			<groupId>com.shop</groupId>
			<version>1.0</version>
		</dependency>
		<dependency>
			<artifactId>shop-common-mysql</artifactId>
			<groupId>com.shop</groupId>
			<version>1.0</version>
		</dependency>
三、编写oauthconfig
在前面我们介绍过,使用oauth框架的话,大部分的实现代码都已经在框架里面实现好了,因此这里的话我们只需要配置下即可使用,所以这里重点就是这个oauthconfig,下面我们粘贴下oauthconfig的源码
package org.shop.oauth.server.config;

import org.shop.oauth.server.exception.CustomWebResponseExceptionTranslator;
import org.shop.oauth.server.rule.CustomAuthenticationKeyGenerator;
import org.shop.oauth.server.service.ClientService;
import org.shop.oauth.server.service.UserService;
import org.springframework.beans.factory.annotation.Autowired;
import org.springframework.context.annotation.Bean;
import org.springframework.context.annotation.Configuration;
import org.springframework.data.redis.connection.RedisConnectionFactory;
import org.springframework.security.authentication.AuthenticationManager;
import org.springframework.security.oauth2.config.annotation.configurers.ClientDetailsServiceConfigurer;
import org.springframework.security.oauth2.config.annotation.web.configuration.AuthorizationServerConfigurerAdapter;
import org.springframework.security.oauth2.config.annotation.web.configuration.EnableAuthorizationServer;
import org.springframework.security.oauth2.config.annotation.web.configurers.AuthorizationServerEndpointsConfigurer;
import org.springframework.security.oauth2.config.annotation.web.configurers.AuthorizationServerSecurityConfigurer;
import org.springframework.security.oauth2.provider.error.OAuth2AuthenticationEntryPoint;
import org.springframework.security.oauth2.provider.token.TokenStore;
import org.springframework.security.oauth2.provider.token.store.redis.RedisTokenStore;

import lombok.AllArgsConstructor;
import lombok.extern.slf4j.Slf4j;

/**
 * 认证服务器配置
 *
 */
@AllArgsConstructor
@Configuration
@EnableAuthorizationServer
@Slf4j
public class Oauth2ServerConfig extends AuthorizationServerConfigurerAdapter {

    @Autowired
    private AuthenticationManager authenticationManager;

    @Autowired
	private RedisConnectionFactory connectionFactory;

    @Autowired
    private ClientService clientService;

    @Autowired
    private UserService userService;

    @Override
    public void configure(AuthorizationServerSecurityConfigurer security) throws Exception {
        security.allowFormAuthenticationForClients()
                .authenticationEntryPoint(new OAuth2AuthenticationEntryPoint());
    }

    @Override
    public void configure(ClientDetailsServiceConfigurer clients) throws Exception {
        clients.withClientDetails(clientService);
    }

    @Override
    public void configure(AuthorizationServerEndpointsConfigurer endpoints) throws Exception {
        endpoints.userDetailsService(userService)
                .authenticationManager(authenticationManager)
                .tokenStore(this.getJdbcTokenStore())
                .exceptionTranslator(new CustomWebResponseExceptionTranslator());
                ;
    }

    @Bean
    public TokenStore getJdbcTokenStore(){
    	RedisTokenStore tokenStore = new RedisTokenStore(connectionFactory);
        tokenStore.setAuthenticationKeyGenerator(new CustomAuthenticationKeyGenerator ());
        return tokenStore;
    }


}
这里的话就核心的3个方法,我们分别介绍下:
public void configure(AuthorizationServerSecurityConfigurer security) throws Exception {}
这个方法主要用来配置令牌端点(Token Endpoint)的安全约束
public void configure(ClientDetailsServiceConfigurer clients) throws Exception{}
这个方法主要是用来配置客户端信息的查询,一般我们会自定义,也就是从mysql中查询出对应的客户端信息,然后通过这个信息再进行比对。
public void configure(AuthorizationServerEndpointsConfigurer endpoints) throws Exception{}
这个方法主要是用来配置用户信息的查询,一般我们会自定义,这里主要做几个事情:
1、去数据库查询用户信息
2、把oauth的token存放在redis中
3、把token改写成jwt的样式
等等操作
上面的代码主要就是配置这三个方法用。
三、配置spring security
在springboot或者spring cloud里面我们使用的oauth一般都是基于spring security的,因此这里我们主要也需要配置spring security。这里我们添加一个WebSecurityConfig的类,他的完整代码如下:
package org.shop.oauth.server.config;

import org.shop.oauth.server.service.UserService;
import org.springframework.beans.factory.annotation.Autowired;
import org.springframework.context.annotation.Bean;
import org.springframework.context.annotation.Configuration;
import org.springframework.security.authentication.AuthenticationManager;
import org.springframework.security.config.annotation.authentication.builders.AuthenticationManagerBuilder;
import org.springframework.security.config.annotation.web.builders.HttpSecurity;
import org.springframework.security.config.annotation.web.configuration.EnableWebSecurity;
import org.springframework.security.config.annotation.web.configuration.WebSecurityConfigurerAdapter;
import org.springframework.security.core.userdetails.UserDetailsService;
import org.springframework.security.crypto.bcrypt.BCryptPasswordEncoder;
import org.springframework.security.crypto.password.PasswordEncoder;

/**
 * SpringSecurity配置
 *
 */
@Configuration
@EnableWebSecurity
public class WebSecurityConfig extends WebSecurityConfigurerAdapter {

	@Override
	protected void configure(HttpSecurity http) throws Exception {
		http.authorizeRequests()
				.antMatchers("/js/**", "/css/**", "/data/**", "/img/**", "/less/**", "/plugins/**", "/sass/**",
						"/scss/**", "/logout/**")
				.permitAll().anyRequest().authenticated().and().formLogin().loginPage("/login").permitAll().and()
				.logout().logoutUrl("/logout").permitAll();

	}

	@Autowired
	private UserService userService;

	@Override
	protected void configure(AuthenticationManagerBuilder auth) throws Exception {
		auth.userDetailsService(userService).passwordEncoder(password());
	}

	@Bean
	public PasswordEncoder password() {
		return new BCryptPasswordEncoder();
	}

	/**
	 * 重新实例化bean
	 */
	@Override
	@Bean
	public AuthenticationManager authenticationManagerBean() throws Exception {
		return super.authenticationManagerBean();
	}

}
这里的话我们就配置完了,然后我们启动下看看:
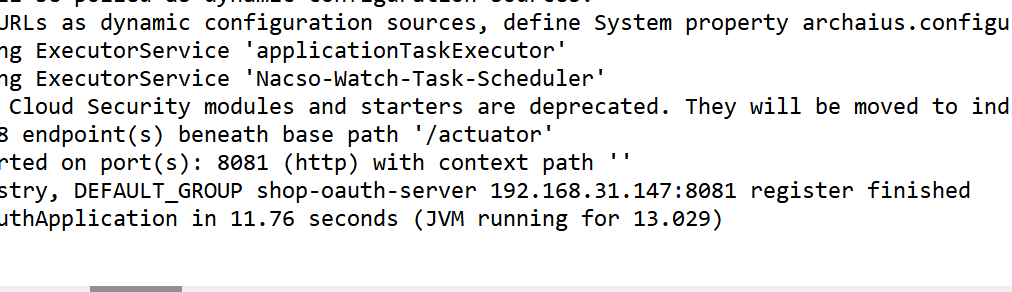
四、测试
这里我们在回顾一下,这里我们没有编写任何controller,主要是由于oauth框架已经实现了这些接口,因此对于我们来说我们不再需要编写这些接口,只要配置好,启动对应的项目就可以请求这些接口了。下面我们直接来测试一下:
1)测试下password模式
这里我们使用如下的请求申请accesstoken
http://127.0.0.1:8081/oauth/token?grant_type=password&scope=all&client_id=book&client_secret=book&username=wang&password=wang&device_type=1
postman测试的截图如下:
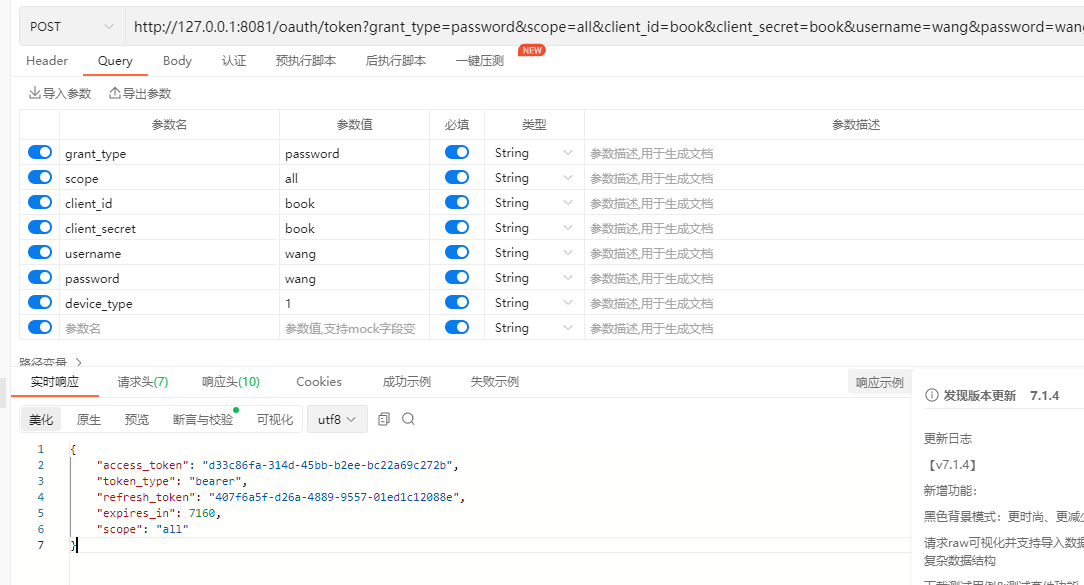
可以看到能请求成功,并且我们获取到了access_token和refresh_token
2)测试刷新token
这里我们测试下使用refresh_token来刷新整个token,请求示例如下:
http://127.0.0.1:8081/oauth/token?grant_type=refresh_token&client_id=book&client_secret=book&refresh_token=407f6a5f-d26a-4889-9557-01ed1c12088e
postman测试的截图如下:
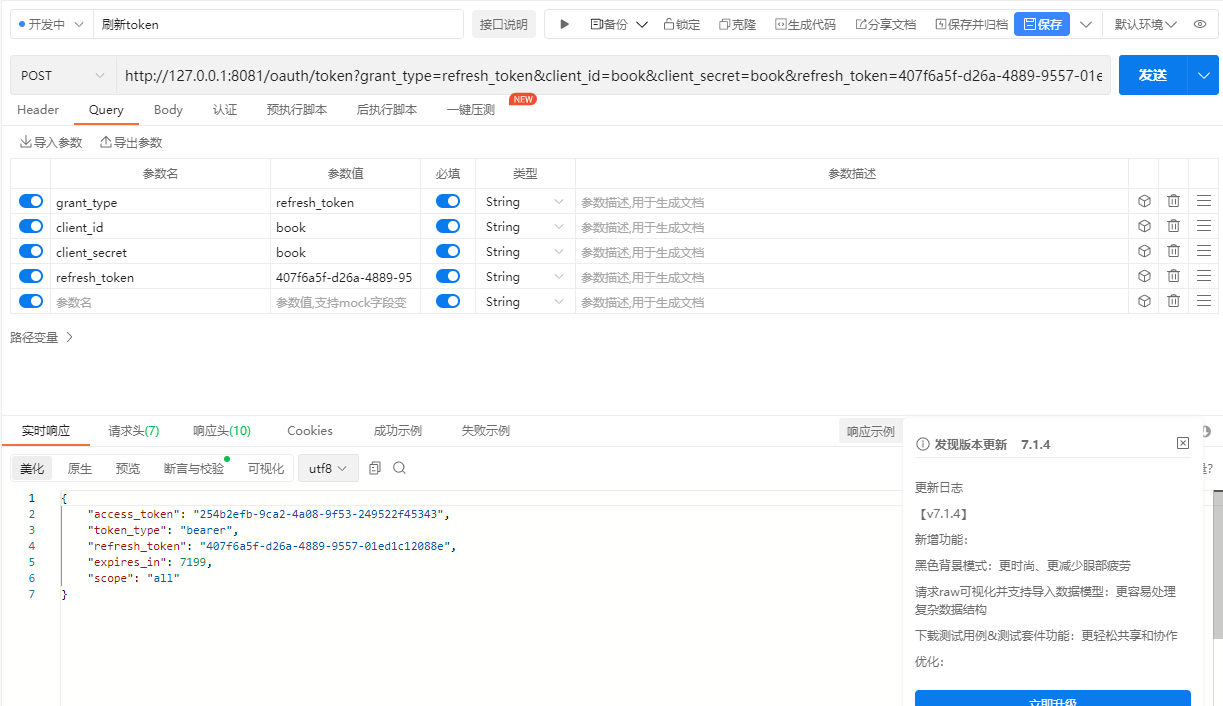
可以看到请求完全成功。
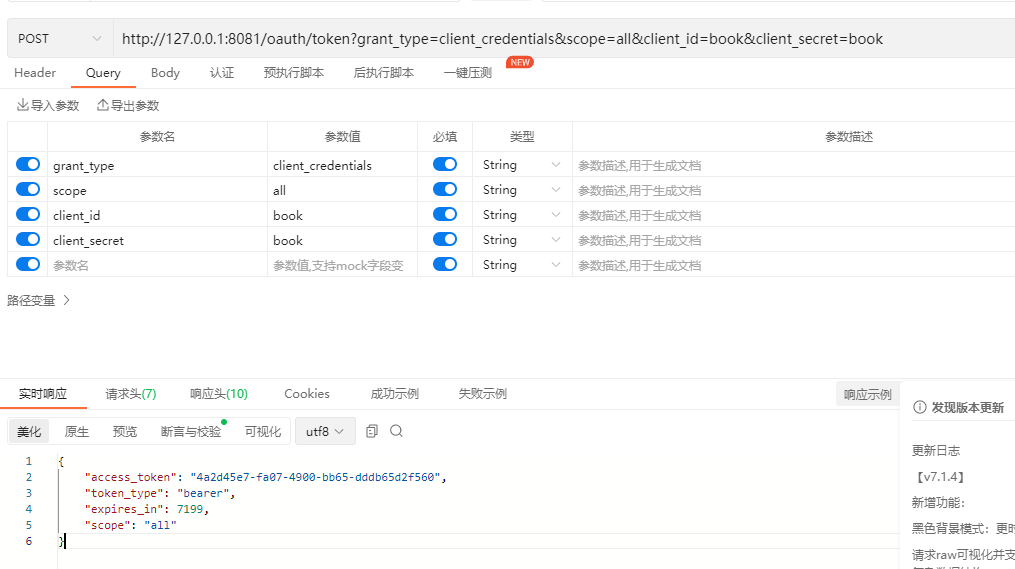
3)测试客户端模式
这里我们使用客户端授权模式来演示获取accesstoken,请求示例如下:
http://127.0.0.1:8081/oauth/token?grant_type=client_credentials&scope=all&client_id=book&client_secret=book
postman测试效果如下:
以上就是我们一个非常简单的利用spring security来实现oauth2的案例。大家可以尝试一下。
备注:
1、这里我们只是列出了核心的代码,所以直接根据当前代码填充项目的时候会发现很多类找不到,因此如果在实际中进行填充,那么这里建议把源码下载下来运行下看看。
2、这里我们测试没有演示简单模式,因此这里暂时不支持简单模式。
3、这里我们测试没有演示授权码模式,因为那块需要页面跳转,当前只实现了接口部分的信息,因此后面我们会专门介绍这个授权码模式。
最后按照惯例,附上本案例的源码,登录后即可下载。


还没有评论,来说两句吧...