
接上篇《微服务实战spring cloud alibaba(十)为spring cloud gateway增加跨域filter》,我们这里添加了一个filter用于解决跨域,今天我们来个日常中最常用的token校验。
本章主要演示的功能是:
1、user-service添加一个登录接口,使用jwt进行登录
2、user-service添加一个获取账户信息的接口。
3、gateway-service添加一个AuthorizeFilter,用于拦截request header里面的token,并解析jwt。
然后我们阐述下具体的实践过程
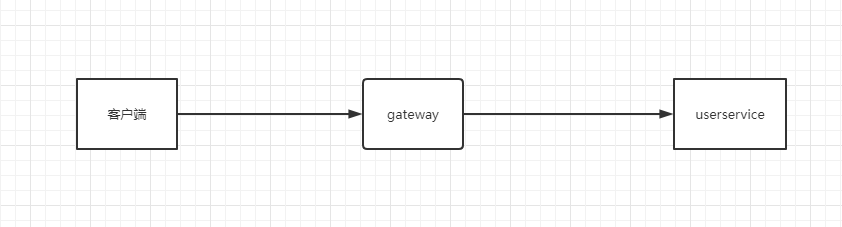
1、客户端通过访问127.0.0.1:9000/user/login,gateway不会对此接口进行拦截,会直接转发到userservice 服务进行登录。
2、userservice服务里面模拟用户登录成功,(这里我们没有连接数据库,因此直接是模拟的状态)
3、客户端登录成功后会返回:
{
    "errorCode": 200,
    "errorMsg": "请求成功",
    "data": {
        "userId": 1234567890123456789,
        "userName": "zhangsan",
        "token": "eyJhbGciOiJIUzI1NiJ9.eyJqdGkiOiI3MzA1NGZjZi1lOTYzLTRmODYtOGUwNS1jZDQwNTY5NmJjODAiLCJpYXQiOjE2NDk5MTk2NzYsInN1YiI6IntcInVzZXJJZFwiOjEyMzQ1Njc4OTAxMjM0NTY3ODksXCJ1c2VyTmFtZVwiOlwiemhhbmdzYW5cIn0iLCJleHAiOjE2NDk5MjMyNzZ9.HaWQpKa0h5OIYrGViIIuKuAFBnpl5vYfFHmw3Rd_3CQ"
    }
}4、客户端访问127.0.0.1:9000/user/getAccountId接口,在header参数里面不带token,访问的时候会直接被gateway拦截掉,返回未登录
{
    "errorCode": 402,
    "errorMsg": "用户未登录"
}5、客户端访问127.0.0.1:9000/user/getAccountId接口,在header参数里面带上token,gateway会进行校验,成功后会把这个服务转发给uservice相应。客户端会看到如下情况:
{
    "errorCode": 200,
    "errorMsg": "请求成功",
    "data": "用户信息1234567890123456789获取完成"
}
上诉大致的流程我们就讲解完了。话不多说,直接上代码:
一、在u-common项目里面创建JWTUtils.java文件
package com.umall.common.utils;

import java.util.Base64;
import java.util.Date;
import java.util.HashMap;
import java.util.Map;
import java.util.UUID;

import javax.crypto.SecretKey;
import javax.crypto.spec.SecretKeySpec;

import org.springframework.stereotype.Component;

import com.alibaba.fastjson.JSON;

import io.jsonwebtoken.Claims;
import io.jsonwebtoken.JwtBuilder;
import io.jsonwebtoken.Jwts;
import io.jsonwebtoken.SignatureAlgorithm;

@Component
public class JWTUtils {

	// 加密 解密时的密钥 用来生成key
	public static final String JWT_KEY = "b0baee9d279d34fa1dfd71aadb908c3f";

	/**
	 * 生成加密后的秘钥 secretKey
	 *
	 * @return
	 */
	public static SecretKey generalKey() {
		byte[] encodedKey = Base64.getDecoder().decode(JWTUtils.JWT_KEY);
		SecretKey key = new SecretKeySpec(encodedKey, 0, encodedKey.length, "AES");
		return key;
	}

	public static String createJWT(String id, String subject, long ttlMillis) {

		SignatureAlgorithm signatureAlgorithm = SignatureAlgorithm.HS256; // 指定签名的时候使用的签名算法,也就是header那部分,jjwt已经将这部分内容封装好了。
		long nowMillis = System.currentTimeMillis();// 生成JWT的时间
		Date now = new Date(nowMillis);
		SecretKey key = generalKey();// 生成签名的时候使用的秘钥secret,这个方法本地封装了的,一般可以从本地配置文件中读取,切记这个秘钥不能外露哦。它就是你服务端的私钥,在任何场景都不应该流露出去。一旦客户端得知这个secret,
										// 那就意味着客户端是可以自我签发jwt了。
		JwtBuilder builder = Jwts.builder() // 这里其实就是new一个JwtBuilder,设置jwt的body
//                .setClaims(claims)            //如果有私有声明,一定要先设置这个自己创建的私有的声明,这个是给builder的claim赋值,一旦写在标准的声明赋值之后,就是覆盖了那些标准的声明的
				.setId(id) // 设置jti(JWT ID):是JWT的唯一标识,根据业务需要,这个可以设置为一个不重复的值,主要用来作为一次性token,从而回避重放攻击。
				.setIssuedAt(now) // iat: jwt的签发时间
				.setSubject(subject) // sub(Subject):代表这个JWT的主体,即它的所有人,这个是一个json格式的字符串,可以存放什么userid,roldid之类的,作为什么用户的唯一标志。
				.signWith(signatureAlgorithm, key);// 设置签名使用的签名算法和签名使用的秘钥
		if (ttlMillis >= 0) {
			long expMillis = nowMillis + ttlMillis;
			Date exp = new Date(expMillis);
			builder.setExpiration(exp); // 设置过期时间
		}
		return builder.compact(); // 就开始压缩为xxxxxxxxxxxxxx.xxxxxxxxxxxxxxx.xxxxxxxxxxxxx这样的jwt
	}

	public static Claims parseJWT(String jwt) {

		SecretKey key = generalKey(); // 签名秘钥,和生成的签名的秘钥一模一样
		Claims claims = Jwts.parser() // 得到DefaultJwtParser
				.setSigningKey(key) // 设置签名的秘钥
				.parseClaimsJws(jwt).getBody();// 设置需要解析的jwt
		return claims;
	}

}
二、在user-service 项目里面创建UserAccountController.java文件
package com.umall.user.controller;

import java.util.UUID;

import org.springframework.beans.factory.annotation.Autowired;
import org.springframework.security.crypto.bcrypt.BCrypt;
import org.springframework.web.bind.annotation.RequestBody;
import org.springframework.web.bind.annotation.RequestHeader;
import org.springframework.web.bind.annotation.RequestMapping;
import org.springframework.web.bind.annotation.RestController;

import com.alibaba.fastjson.JSON;
import com.umall.common.enu.HttpResponseStatus;
import com.umall.common.model.BaseResponse;
import com.umall.common.model.UserAccountPoJo;
import com.umall.common.utils.JWTUtils;
import com.umall.user.request.UserAccountRequestBody;
import com.umall.user.response.UserAccountResponseBody;

import lombok.extern.slf4j.Slf4j;

@RestController
@Slf4j
public class UserAccountController {

	@Autowired
	JWTUtils jwtutils;

	/**
	 * 这里只是模拟用户登录,假设用户输入的用户名和密码是正确的
	 *
	 * @param user
	 * @return
	 */
	@RequestMapping(path = "/login")
	public BaseResponse loginByUserNameAndPassword(@RequestBody UserAccountRequestBody user) {

		// 从数据库中获取到密码,这里我们不连接数据库,直接模拟即可DB.getPasswordByUserName(user.getUserName());
		String password = BCrypt.hashpw(user.getPassword(), BCrypt.gensalt());

		log.info("存储到数据库的密码是:{}", password);
		boolean checkSuccess = BCrypt.checkpw(user.getPassword(), password);
		if (checkSuccess) {

			UserAccountPoJo build = UserAccountPoJo.builder().userId(1234567890123456789L).userName(user.getUserName())
					.build();

			String token = jwtutils.createJWT(UUID.randomUUID().toString(), JSON.toJSONString(build), 3600L * 1000);
			UserAccountResponseBody body = UserAccountResponseBody.builder().userId(1234567890123456789L)
					.userName(user.getUserName()).token(token).build();
			// 然后token放到redis中存储,这里略过
			return BaseResponse.success(body);
		} else {
			return BaseResponse.fail(HttpResponseStatus.LOGINERROR);
		}
	}

	@RequestMapping(path = "/getAccountId")
	public BaseResponse getAccountInfo(@RequestHeader("userId") Long userId) {
		return BaseResponse.success("用户信息" + userId + "获取完成");
	}

}
三、在gateway项目里面创建AuthorizeFilter.java文件
package org.gateway.service.gateway.filter;

import org.apache.commons.lang.StringUtils;
import org.springframework.cloud.gateway.filter.GatewayFilterChain;
import org.springframework.cloud.gateway.filter.GlobalFilter;
import org.springframework.core.Ordered;
import org.springframework.core.io.buffer.DataBuffer;
import org.springframework.http.HttpHeaders;
import org.springframework.http.HttpStatus;
import org.springframework.http.MediaType;
import org.springframework.http.server.reactive.ServerHttpRequest;
import org.springframework.http.server.reactive.ServerHttpResponse;
import org.springframework.stereotype.Component;
import org.springframework.web.server.ServerWebExchange;

import com.alibaba.fastjson.JSON;
import com.alibaba.fastjson.JSONObject;
import com.google.common.io.BaseEncoding;
import com.umall.common.enu.HttpResponseStatus;
import com.umall.common.model.BaseResponse;
import com.umall.common.model.BaseResponse.BaseResponseBuilder;
import com.umall.common.model.UserAccountPoJo;
import com.umall.common.utils.JWTUtils;

import io.jsonwebtoken.Claims;
import lombok.extern.slf4j.Slf4j;
import reactor.core.publisher.Flux;
import reactor.core.publisher.Mono;

/**
 * 鉴权过滤器 验证token
 */
@Component
@Slf4j
public class AuthorizeFilter implements GlobalFilter, Ordered {
	private static final String AUTHORIZE_TOKEN = "token";

	@Override
	public Mono<Void> filter(ServerWebExchange exchange, GatewayFilterChain chain) {
		// 1. 获取请求
		ServerHttpRequest request = exchange.getRequest();
		// 2. 则获取响应
		ServerHttpResponse response = exchange.getResponse();
		// 3. 如果是登录请求则放行
		if (request.getURI().getPath().contains("/user/login")) {
			return chain.filter(exchange);
		}
		// 4. 获取请求头
		HttpHeaders headers = request.getHeaders();
		// 5. 请求头中获取令牌
		String token = headers.getFirst(AUTHORIZE_TOKEN);
		// 6. 判断请求头中是否有令牌
		if (StringUtils.isEmpty(token)) {
			return this.userNotLoginAction(response);
		}
		// 9. 如果请求头中有令牌则解析令牌
		try {
			String subject = JWTUtils.parseJWT(token).getSubject();
			log.info("解析出来的用户信息是:{}", subject);
			UserAccountPoJo poJo = JSON.parseObject(subject, UserAccountPoJo.class);
			ServerHttpRequest newRequest = exchange.getRequest().mutate()
					.header("userId", String.valueOf(poJo.getUserId())).build();
			return chain.filter(exchange.mutate().request(newRequest).build());
		} catch (Exception e) {
			log.error(e.getMessage(), e);
			// 10. 解析jwt令牌出错, 说明令牌过期或者伪造等不合法情况出现
			return this.userNotLoginAction(response);
		}
		// 12. 放行
	}

	private Mono<Void> userNotLoginAction(ServerHttpResponse response) {
		BaseResponse resultJson = BaseResponse.fail(HttpResponseStatus.USERNOTLOGIN);
		byte[] bytes = JSONObject.toJSONBytes(resultJson);
		response.getHeaders().add("Content-Type", MediaType.APPLICATION_JSON_VALUE);
		DataBuffer buffer = response.bufferFactory().wrap(bytes);
		return response.writeWith(Flux.just(buffer));
	}

	@Override
	public int getOrder() {
		return 0;
	}
}
好了,按照上面的流程进行测试即可。
最后咱们补充下说明这代码里面几个比较重要的知识点:
1、gateway里面如果需要返回错误的信息,并且返回json,需要使用这样子的代码:
                BaseResponse resultJson = BaseResponse.fail(HttpResponseStatus.USERNOTLOGIN);
		byte[] bytes = JSONObject.toJSONBytes(resultJson);
		response.getHeaders().add("Content-Type", MediaType.APPLICATION_JSON_VALUE);
		DataBuffer buffer = response.bufferFactory().wrap(bytes);
		return response.writeWith(Flux.just(buffer));
2、在gateway里面我们模拟了jwt解密,把json解析出来,然后使用网关向下传递userid,这样子在其他的微服务service里面就不用再去解析一遍用户信息,直接拿解析出来的userid使用即可。
3、在gateway里面如果要自定义向下传递参数的话,需要使用如下这样的代码:
                        UserAccountPoJo poJo = JSON.parseObject(subject, UserAccountPoJo.class);
			ServerHttpRequest newRequest = exchange.getRequest().mutate()
					.header("userId", String.valueOf(poJo.getUserId())).build();
			return chain.filter(exchange.mutate().request(newRequest).build());
4、gateway一般我们在header头里面转发自定义参数,因此在服务里面,取值的话,需要从header里面取,所以需要用到如下这样的代码:
@RequestHeader("userId") Long userId好了,今天就介绍到这里,总结一下:
1、实现了jwt的登录,加密,解密
2、实现了gateway进行拦截。
3、实现了gateway转发自定义参数
本项目代码下载:点击下载


还没有评论,来说两句吧...